Once you have designed and implemented your CAT you are ready to test it in preparation for publishing to the CloudApp Catalog.
Test CloudApps
To help you in the CAT development process, Self-Service provides the notion of Test
CloudApps. Any CAT launched from the Designer is considered a Test CloudApp, will be labeled as such in the UI, and is hidden from End Users in Self-Service.
Although these Test CloudApps are hidden from End Users in the UI so that they don't clutter up the user experience, they are still accessible if a user is provided a direct link. One important distinction between a Test CloudApp and a normal CloudApp is that Test CloudApps do not use permission delegation.
Any CloudApp launched from the Designer UI or Manager API is considered a Test CloudApp. To launch a normal CloudApp through the API, use Application.launch
Uploading the CAT
Once you have your CAT constructed it is time to upload it using the Self-Service Portal. The process of uploading includes adding your CAT to the list of templates in the Designer View as well as parsing and compiling the file. Use the following steps to upload your CAT file.
- Login to the Self-Service portal and navigate to the Designer view.
- Click Upload a CAT.
- Select the CAT you want to upload in the File Upload dialog and click Open.
- The selected CAT is parsed and compiled. If your CAT is malformed, an error message will be displayed and the upload will not be successful.
- Once the CAT is parsed and compiled successfully it will be displayed in the list of available CATs in the Designer View.
CAT files are unique based on the name field inside the CAT, not on filename. If you get a warning that you are overriding an existing CAT, it means that there exists a CAT with the same name value
Launching the CAT
Once you have successfully uploaded your CAT you can begin launching and testing your new deployment. Use the following steps to launch your CAT.
- In the Designer View, select the CAT you want to test by clicking the check box in the left-hand column.
Choose Selected Actions > Launch CloudApp from the menu.

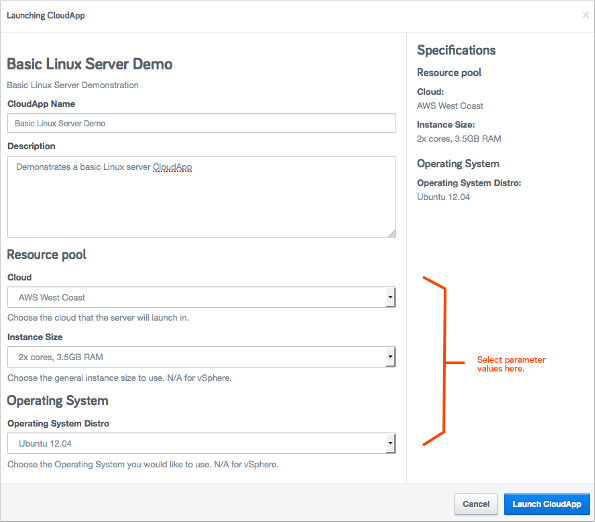
A dialog similar to the following displays. Parameters specified in the CAT are shown as text fields and drop-down controls grouped by the defined categories. Enter your desired parameter values and an optional Schedule, then click Launch CloudApp. See Creating Schedules for additional information on setting up and managing CloudApp runtime schedules.
The UI switches to the CloudApps view and the launch process initiates. The launch status is displayed in the UI.
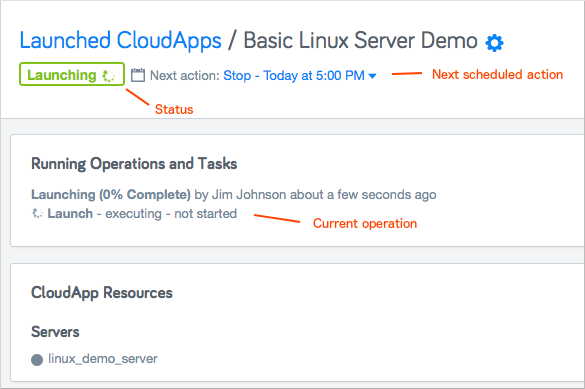
If the launch is successful, the UI will indicate that the CloudApp has reached the running state. Output values are displayed by category on separate tabs.
Once you are satisfied with your CAT testing you can proceed to Publishing CATs.