Overview
Schedule Manager provides the ability to create a runtime schedule which can be assigned to a given CloudApp at launch time. This feature allows users to proactively ensure that the cloud resources managed in Self-Service do not run longer than they are actually needed. The Schedule Manager is helpful in addressing the condition where instances continue to run at hours during which nobody is using them, thereby helping to reduce cost.
As always, this capability is provided with a full API to manage schedules should you choose to leverage it.
There are 3 primary steps to using Schedules in Self-Service:
- Create schedules
- Attach (associate) schedules to publications in the Catalog
- Select schedules when launching Catalog items
In addition, this section also describes how to update a schedule for an existing/running CloudApp.
Create a New Schedule
To take advantage of the features provided by the Schedule Manager you must first create one or more schedules in Self-Service. Use the following procedure to create a new schedule.
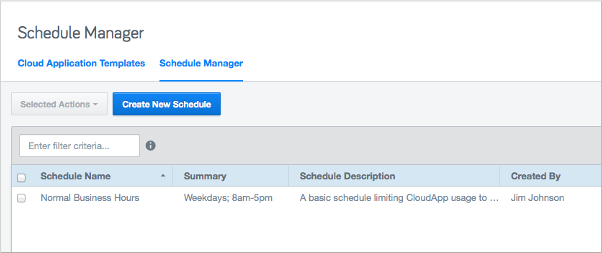
- In the Self-Service user interface, navigate to the Designer view and click the Schedule Manager tab.
Click Create New Schedule. The following dialog displays.
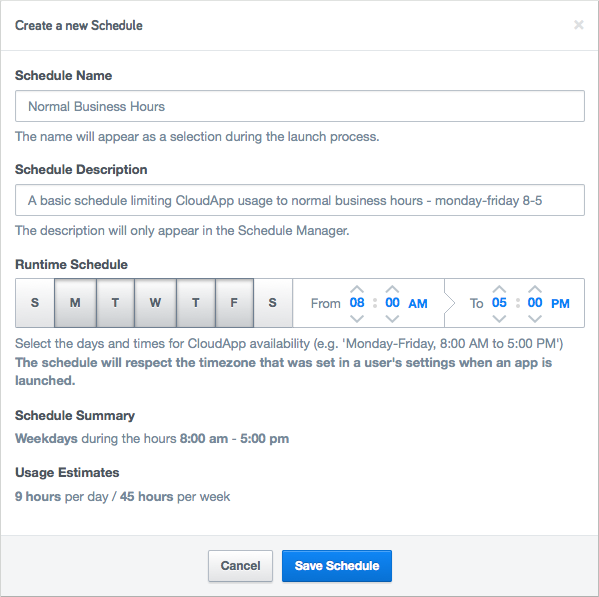
Enter a meaningful name for the new schedule in the Schedule Name field.
Enter a short description for the new schedule in the Schedule Description field.
Use the available controls to specify the days of the week and the time range for the new schedule. (Note: Today the UI only provides for very basic schedules. If you require more complex schedules, please contact us or consider using the API.)
Review the Schedule Summary at the bottom of the dialog and click Save Schedule. The new schedule now appears in the Schedule Manager.
Associate a Schedule with a CloudApp
Once you have created schedules in Self-Service, you can then associate them with CloudApps as they are published. Note that a published CloudApp can have multiple schedules associated with it, but an end-user will only be able to select one schedule for the CloudApp when it is launched. The following steps outline the procedure for associating a schedule with a CloudApp during the publication step.
In the Self-Service user interface, navigate to the Designer view, select a CloudApp and click Publish to Catalog. The following dialog displays.
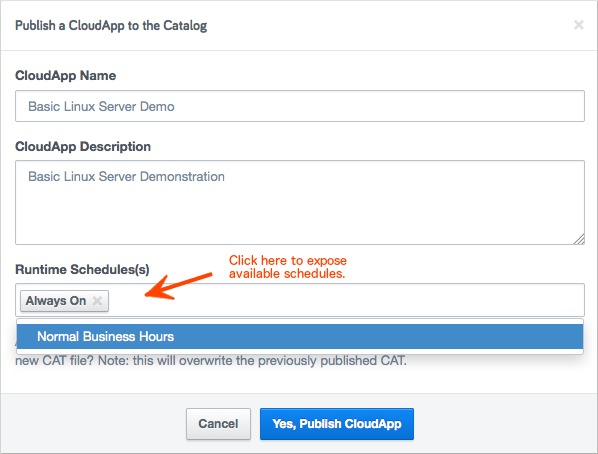
Enter a name in the CloudApp Name field.
Enter a meaningful description in the CloudApp Description field.
Click in the Runtime Schedule(s) drop-down to expose the available schedules and select the desired schedule. Repeat this step for each schedule you wish to associate with the published CloudApp. (Note: The
Always On
schedule is always available in this dialog, but can be removed. It represents the lack of a schedule - that no automated starting or stopping of the application will take place.Click Yes, Publish CloudApp.
Select a Schedule when Launching a CloudApp
Once a designer has published a CloudApp with one or more associated runtime schedules to the Catalog, end-users can select from a list of available schedules for each CloudApp they launch. The following procedure outlines the steps for selecting a runtime schedule when launching a CloudApp.
In the Self-Service user interface, navigate to the Catalog view, select a CloudApp and click Launch. A dialog similar to the following displays.
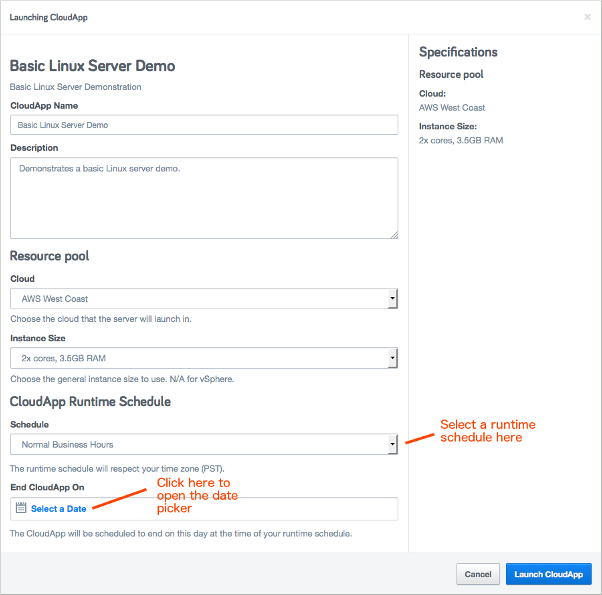
Enter a CloudApp Name, Cloud Description, and select parameter values as needed.
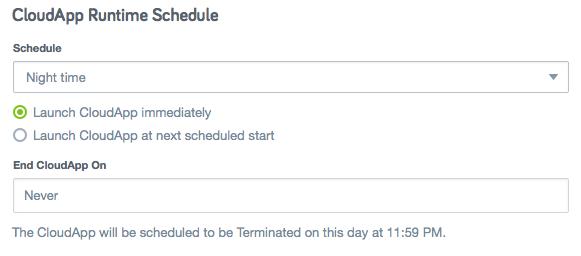
Click in the Schedule drop-down to expose the schedules that are available to your CloudApp. Choose the schedule that is most appropriate for your intended use. Note that as an end-user you may only select one runtime schedule. Optionally, use the End CloudApp On control to select an end date for your CloudApp. If you select a schedule that is not currently active and outside the current time, you are given the option to Launch CloudApp immediately or Launch CloudApp at next scheduled start. Choosing the Launch CloudApp at next scheduled start option will keep the CloudApp in the Not Started state until the first scheduled start, at which time the CloudApp will launch. Otherwise, the CloudApp will launch immediately by default.
Click Launch CloudApp.
Updating a Schedule for an Existing Running CloudApp
You can update the end date and schedule associated with an existing, running CloudApp using the UI or the API. In the UI, just go to the CloudApp Details page and select the end date or schedule -- you can also remove an end date if you don't want the CloudApp to be terminated. The next scheduled operation is updated automatically and immediately.
Updating or Removing the End Date
To update or remove the End Date for a running CloudApp, do the following.
- Navigate to the details page for the running CloudApp.
In the Summary pane, click the Ending On control to expose the date picker.

Select a new date or click No End Date to keep your CloudApp running indefinitely.
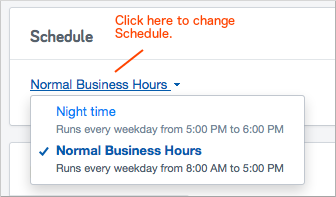
Changing the Schedule for a Running CloudApp
If your CloudApp has more than one associated schedule, you can change the currently active schedule using the following steps.
- Navigate to the details page for the running CloudApp.
In the Schedule pane, click the Schedule control drop-down and select a different schedule.