Replicate an Image to Different EC2 Regions
Overview
Images are AWS region-specific. For example, you cannot use an AMI that stored in 'AWS US-East' to launch a server instance in the 'AWS US-West' region. In order to use the same AMI in multiple regions, you must migrate/replicate the image to the new cloud or AWS region.
At this time only replication of instance-store (S3) AMIs is supported (EBS AMIs unsupported).
Prerequisites
Before you can replicate an image to a different EC2 region, you must already have an S3 bucket (in that region) into which you can replicate an image. The example below assumes you're replicating an image from AWS US-East to AWS-EU, but the same steps are the same regardless of which region you're replicating an image into.
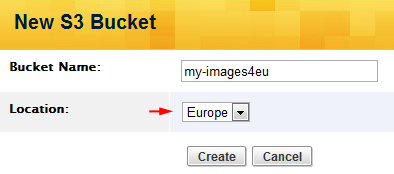
To replicate an image into AWS-EU, you must create an S3 bucket in Europe.
- Go to Clouds > AWS Global > S3 Browser. Create a new bucket and be sure to specify
Europe
as its location.
Steps
Use the following procedure to replicate (copy) a machine image to another AWS region (e.g. 'us-east' to 'us-west') so that you can use it to launch instances in that region. You are essentially creating a new image in a different AWS region that's a duplicate of an existing image.
- Go to Clouds > AWS US-East > Images. Under the Personal tab, select an image that you would like to make available in the EC2-EU region.
- Click the Replicate button.

- Next, specify the S3 bucket where you would like to store the image. Notice that the S3 bucket is EU.
Some kernels and ramdisks cannot be copied over to different EC2 regions, therefore you may need to select a different kernel. Only kernels that can be copied over will be listed.
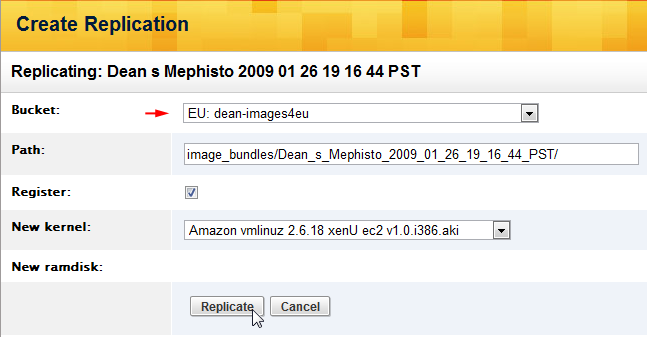
- Click the Replicate action button.
Your image will not be available immediately. The length of time needed to replicate the image to a different region depends on how busy the queue is, and the size of the data to transfer for your image. You will see a flash message similar to the following: Your EC2 image replication task has been placed to a queue. The EC2 images list will be updated soon.
Post Tutorial Steps
Once your image is available for use in the EC2-EU region, you can select it when you add the EC2-EU cloud to your ServerTemplate.
Create a Custom RightImage (AMI)
Overview
RightScale regularly publishes updated RightImages for CentOS and Ubuntu. If possible, we recommend using one of our published RightImages. However, we do realize that we can't create and support a RightImage that satisfies the requirements for every type of application. As a result, we've provided a way to create your own custom RightImage
where you can specify different combinations of operating systems or software package versions. Although this document is best suited for making minor modifications to a CentOS or Ubuntu image, you can also use it as a model for creating other types of images.
Disclaimer
RightScale is not responsible for supporting custom RightImages. In theory, you should be able to use a custom RightImage that was created following this tutorial with ServerTemplates published by RightScale, but we cannot make any guarantees. If you choose to create a custom RightImage using this method, you are responsible for properly testing its functionality.
Prerequisites
- 'actor' and 'library' user role privileges
- This feature is reserved for advanced users.
Steps
- Go to Design > ServerTemplates. Use the filter tool to find the following ServerTemplates:
- RightImage Creator - CentOS (Beta)
- RightImage Creator - Ubuntu (Beta)
- Import the ServerTemplate that will best suit your needs.
- Create an S3 bucket that will be used to store the files for the custom AMI. It will be easier to find the files if you create a new S3 bucket, but if you want to use an existing S3 bucket instead, you can proceed to the next step.
- Create a new Deployment (e.g. Image Creator)
- Clone the ServerTemplate if you wish to add scripts to the boot sequence to install/configure additional components for the image
- Add a Server into the Deployment using the ServerTemplate (imported or cloned). Be sure to add the Server in the AWS region (e.g. AWS US-East) where you want to create the AMI. Remember, images are region-specific.
- If you cloned the template to add customization, add any scripts before the last script in the boot scripts of the template for any modifications.
When running commands to modify the image, ensure you usechrootwith the location of the image. Here is an example that installs an additional package (Ubuntu):#!/bin/sh chroot "$ROOT" apt-get -y install joe - Launch the Server.
- Specify the following Input parameters:
- AWS_BUCKET - Enter the name of the S3 bucket where the image files will be stored.
- IMAGE_NAME - Enter the name of the custom AMI that you are about to create.
- ARCH - Select either i386 for a 32-bit architecture or x86_64 for a 64-bit architecture.
- If the Server becomes operational, the custom AMI was created successfully. You will find the new AMI in the specified S3 bucket.
- To test its functionality, see Test a Custom RightImage (AMI).
Test a Custom RightImage (AMI)
Use the following procedure tp perform a functional test on a custom AMI that was built following the Create a Custom RightImage (AMI) tutorial.
Prerequisites
- A RightScale account where you have 'actor' user role privileges.
- This document assumes that you successfully created a custom AMI following the Create a Custom RightImage (AMI) tutorial.
Steps
- Create a MultiCloud Image for the custom AMI that you previously created. In order to test the custom RightImage, you will need to create a MultiCloud Image that points to it. See Create a New MultiCloud Image.
- The next step is to modify a ServerTemplate and use the new MultiCloud Image. For example, you could clone an existing ServerTemplate that uses one of our published MultiCloud Images that's referencing RightImages published by RightScale and swap out the MultiCloud Image with the one that uses your custom AMI. It's important to use a ServerTemplate that you know works as expected with one of our RightImages. This way, if there's a problem launching a server, you know that the custom RightImage was not built properly.
- It's also important that the ServerTemplate uses software repositories that are just as new as the custom image itself. Under the ServerTemplate's Scripts tab, freeze the repositories to a date that is either the same day as when the image was created or more recent.
- Create a new Deployment or use the Deployment that was used to create the custom AMI (e.g. Image Creator)
- Add a Server into the Deployment using the cloned ServerTemplate. Be sure to add the Server in the AWS region (e.g. AWS US-East) where you created the custom RightImage.
- Launch the Server.
- If the Server becomes operational, the custom RightImage has successfully passed a basic functional test. You will most likely be able to replace a ServerTemplate's MultiCloud Image with the one that uses your custom RightImage.