Objective
This document walks your through how to change the logo shown at the top left hand corner of RightScale products.
Prerequisites
In order to change the logo, you need the following user permissions on the account (see RightScale user roles):
- Admin
- Enterprise Manager (if the account is a master account; to change the logo on a child account, only Admin is required)
Steps for Setting the Logo in Cloud Management and Optima
- Log into Cloud Management (my.rightscale.com)
- Go to Settings > Account Settings > Preferences.
- Click the Edit button.
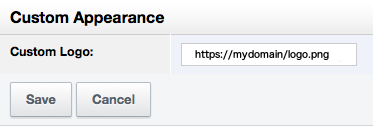
- Under the Custom Appearance field enter the URL of the logo and click Save. Please note that this needs to be an HTTPS URL to the logo.
Limit the height of Primary and Secondary Logo images to 40 pixels to avoid image distortion due to re-sizing.

Cloud Management: You can set a custom logo per RightScale account. If you set the URL in the RightScale master account, then from that point on, any newly created child accounts will inherit the URL of the logo. If you would like to change the logo on the child accounts, you will have to change it per account.
Optima: RightScale Optima will use, in order of highest to least priority: the logo set on your parent RightScale account; the logo set on any of your other RightScale accounts; the default logo.
Steps for Setting the Logo in Self-Service
RightScale Self-Service uses a different method for updating the logo. Please see this page on how to set the Self-Service logo: Self-Service user interface guide - customizing the user interface.