Overview
Google Compute Engine (GCE) provides a networking system in which you can create networks and manage how your instances connect to and interact with the outside world. You can build out real-world GCE workloads solely using RightScale. In addition to working within the CM Dashboard, you can use the RightScale API to automate network provisioning and you can leverage Self-Service CAT files to include GCE networks in CloudApps. This page describes the mapping of GCE Network concepts to RightScale network abstractions and provides the steps for creating Google network components using the RightScale CM Dashboard. You may want to visit the Google (GCE) Networks and Firewalls overview for additional information.
Mapping GCE Network Concepts into RS Network Abstractions
The following Table describes how the various GCE Network concepts have been mapped to network abstractions in RightScale.
| GCE Network Component | RightScale Abstraction |
|---|---|
| Network | Network (inc. CIDR range), Subnet, Network Gateway (internet or vpn) |
| External IP Address | Public IP Address |
| Internal IP Address | Private IP Address |
| Firewall | Security Group |
| Route Collection | Route Table |
| Route | Route |
GCE Networks
For more detailed information on how networks are handled in GCE, see the Networks section of the GCE documentation.
Subnetworks
GCE Subnetworks are displayed and can be used when launching instances, but currently cannot be created or managed through RightScale. Legacy networks can be fully managed.
Subnet mode is the new form of networks in which your network is subdivided into regional subnetworks. Each subnetwork controls the IP address range used for VMs that are allocated to that subnetwork. The IP ranges of the different subnetworks in a network might be non-contiguous. There are two options for using subnetworks:
Auto Subnet Network automatically assigns a subnetwork IP prefix range to each region in your network. The instances created in a zone in a specific region in your network get assigned an IP allocated from the regional subnetwork range. The default network for a new project is an auto subnet network.
Custom Subnet Network allows you to manually define subnetwork prefixes for each region in your network. There can be zero, one, or several subnetwork prefixes created per region for a network. In order to create an instance in a zone, you must have previously created at least one subnetwork in that region. At instance creation time, you will need to specify the subnetwork in the region that the instance IP should be allocated from.
Legacy Networks
Legacy (non-subnetwork) mode is the original approach for networks, where IP address allocation occurs at the global network level. This means the network address space spans across all regions. It is still possible to create a legacy network, but subnetworks are the preferred approach and default behavior going forward.
You can use RightScale to customize the default network by adding or removing rules, or you can create new networks in that GCE project. GCE Instances not explicitly attached to a network on launch are attached to the default network.
GCE Firewalls
GCE firewalls provide similar functionality to AWS security groups. A firewall belongs to a network, it has rules that define what incoming connections are accepted by which instances. Each firewall rule specifies a permitted incoming connection request, defined by source, destination, ports, and protocol. Rules may additionally contain target tags that specify which instances on the network can accept requests from the specified sources (if no target tag is specified then the rules applies to all instances attached to the network). For more detailed information on how firewalls are handled in GCE, see the Firewalls section of the GCE documentation.
GCE Routes
By default, every GCE network has two default routes: a route that directs traffic to the Internet and a route that directs traffic to other instances within the GCE network. A single GCE route comprises a route name, a destination range, a next-hop specification, any instance tags, and a priority value. A route specifies the destination IP range in CIDR format, the next hop as an instance, an IP, a gateway or a VPN tunnel, and a priority as a numeric value. Optionally, instance tags are used to specify which instances on the network the route applies to (if no tag is specified then the rules applies to all instances attached to the network). For more detailed information on how routes are handled in GCE, see the Routes Collection section of the GCE documentation.
Prerequisites
- You must have the 'security_manager' user role privilege in order to work with GCE Networks in the RightScale Network Manager.
Create a New GCE Network
The first step in setting up a GCE network using RightScale is to create a new network using the Network Manager.
- In the RightScale Dashboard, navigate to Manage > Networks.
- Click New Network. The New Network dialog displays.
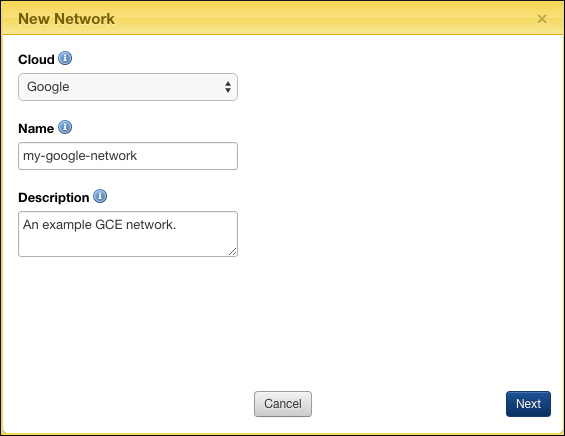
- Select the Google cloud and enter a name for the new network along with a short description. For this example, we will use 'my-google-network' as the network name. Click Next.
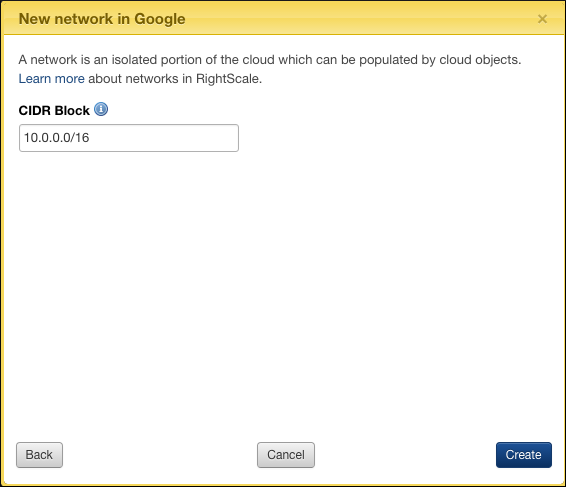
- Enter a value for the CIDR Block (10.0.0.0/16 in this example). The range you specify can contain 16 to 65,536 IP addresses. Note that you cannot change the size of the network after you create it.
- Click Create. You should see a 'growler' message near the top of the Dashboard indicating that the network was created successfully.
Create a New Firewall Rule (Security Group)
By default, a Google network includes one Security Group (or Firewall in Google nomenclature). In this step we will create a new firewall rule.
- In the RightScale Dashboard, navigate to Manage > Networks.
- Enter a meaningful Name for the new Security Group.
- Enter a Description for the new Security Group.
- Select the Common Ports you want to open for this Security Group.
- Click Create.
Create a New Route in the Default Route Table
By default, a Google network includes one route that directs traffic to the Internet and another route that directs traffic to other instances within the network. In this step, we will modify the default route table to include a new route.
- In the RightScale Dashboard, navigate to Manage > Networks.
- Navigate to the Route Tables tab. Click the default route table, then click New Route. The New Route dialog displays.
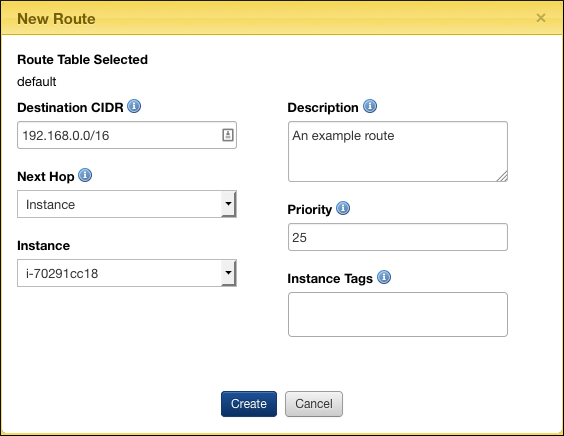
- Enter a Destination CIDR address block for the destination resource.
- Using the Next Hop drop-down, choose the appropriate target type for the next hop for this route (Instance, URL, IP Address). Choosing Instance displays a drop-down from which you can select an existing instance, while choosing URL or IP Address displays a field in which you can enter a valid URL or IP address value. In the above example, we've used an instance.
- Enter a meaningful Description of the route.
- Enter a numeric Priority value for the route. Lower values have higher priority.
- Enter one or more Instance Tags to which the route will apply. If you elect to leave this field empty, the route will apply to all instances.
- Click Create.