SSH into a Server
Objective
To open an SSH terminal session on a Linux-based server for root level access to the running server instance or array instance in the cloud.
Overview
The SSH action opens a terminal session on each selected server instance or array instance using Mindterm or your native SSH client. You can configure the default setting in User Settings > SSH. Note that any selected Server Next, Array Next, or unmanaged instances are ignored by the SSH action.
In the cloud, you still have root level access to the actual running instance. In order to create a secure connection to a running instance, an SSH key is used for authentication purposes. An SSH key is a security component used by some cloud providers to secure client connections to servers in the cloud over SSH or Remote Desktop Protocol (RDP). The type of SSH Key that is used for establishing secure client-server communication depends on the type of underlying RightImage that's being used.
v4 RightImages
For servers launched with v4 RightImages, EC2 SSH Keys are used to create an SSH Console session from the Dashboard, as well as securely run RightScripts on an instance. When you launch an instance in EC2, you must specify which EC2 SSH Key will be used authenticate an SSH Console session. When the instance is actually launched, Amazon will load the public key onto the instance. Later, when you try to SSH into the instance, the matching private key material will be used to authenticate an SSH session. When you SSH into an instance from the RightScale Dashboard/API, it's important that you use an SSH Key where the private key material is stored in RightScale's database, otherwise, RightScale will not be able to provide the matching private key to validate and create an SSH session or run RightScripts (resulting in a stranded in booting
server). One of the shortcomings with this method is that multiple users will use the same SSH Key to SSH into an instance. Therefore, it becomes difficult to control user level access or determine who is actually SSH-ing into an instance. v5 RightImages address this particular issue by enabling Managed SSH for more granular user level SSH access.
v5 RightImages
For servers launched with v5 RightImages, RightLink is used to establish a secure connection between the instance and the RightScale core site for running scripts. Managed SSH is also supported, which allows each user to use their own SSH Key (Settings > User Settings > SSH) to establish secure shell access for client-server connections. If you're using EC2 instances, you must still specify an EC2 SSH Key when you launch an instance. However, it's no longer used for SSH purposes, so it's no longer imperative that the EC2 SSH key have key material stored in the RightScale database like instances using v4 RightImages. But, you can still use the EC2 SSH key to SSH into an instance using a third party tool like PuTTY or AWS Console.
Prerequisites
- A running cloud instance
- Valid key authentication for establishing a secure shell connection. The type of required key authentication varies depending on the underlying machine image and your SSH user preferences and settings.
- 'server_login' and 'server_superuser' if you are running RightImage 5.7 and lower (both roles will need to be enabled to be able to SSH into a server). If you are running 5.8 or newer, like with 5.7 and lower, you can have both roles enabled or you can have either 'server_login' (which allows you to login as the user of the account without root access) and 'server_superuser' (which allows you to login as root to the server). For more information, see RightScale Account and User Management.
- If you're using a cloud that support security groups to control the instance's firewall permissions (e.g. AWS) you must configure the security group to allow SSH access over TCP port 22. See Create a New Security Group.
- If you are using a VLAN cloud that uses IP port forwarding instead of security groups to control an instance's firewall permissions you must set up a port forwarding rule for TCP port 22 to allow SSH access. See Create new Port Forwarding Rules.
- Requires 'server_login' user role privileges to SSH into a server from the RightScale dashboard.
Steps
SSH into a Running Server Instance or Array Instance
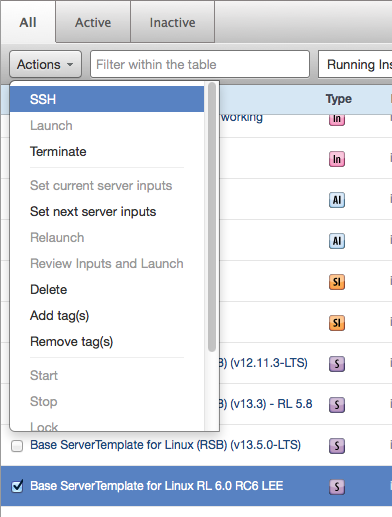
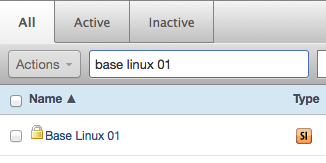
- In the Dashboard user interface, go to Manage > Instances & Servers.
- Select one or more server instances or array instances for which you want to open an SSH session.
Click Actions and select SSH from the drop-down menu. If you selected more than one item you will be prompted for confirmation.
An SSH session is initiated according to your configuration in User Settings -> SSH.
Alternately, you can simply click the SSH icon in the Operations column to initiate an SSH console session.
Launch a Server
Objective
To launch the selected the server (if no instance exists) or launch a new instance into an array.
Overview
On the Instances and Servers page you can either launch a single server or multiple servers at the same time. Similarly, you can launch new instances into one or more selected arrays. Currently running server instances are ignored by the Launch action as are currently running array instances. Unmanaged instances are also ignored.
Prerequisites
- 'actor' user role privileges
Steps
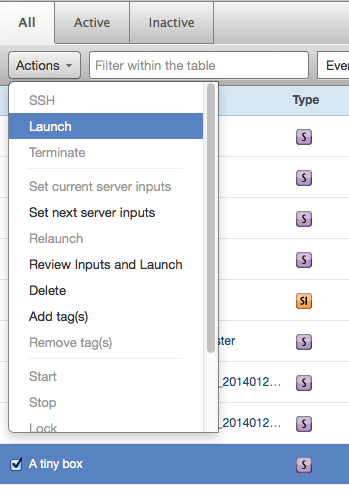
- In the Dashboard user interface, go to Manage > Instances & Servers.
- Select one or more servers you want to launch or the array(s) you want to launch a new instance into.
Click Actions and select Launch from the drop-down menu.
Terminate a Server
Objective
To terminate selected running server instances, all running instances in a selected array, selected instances in a given array, or unmanaged instances.
Note that the Terminate action will only work on a running unlocked server or array instance. Selected servers/instances that are not running are ignored by the Terminate action.
Prerequisites
- Unlocked running Servers/Instances
- 'actor' user role privileges
Steps
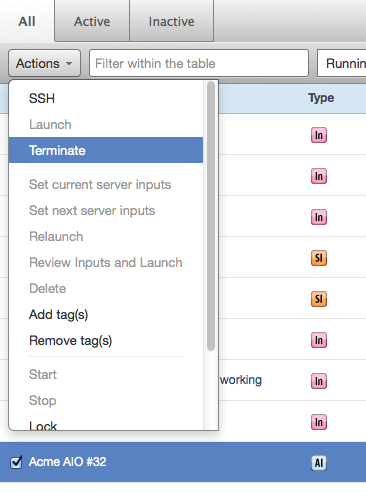
- In the Dashboard user interface, go to Manage > Instances & Servers.
- Select one or more servers, arrays, or array instances.
Click Actions and select Terminate from the drop-down menu.
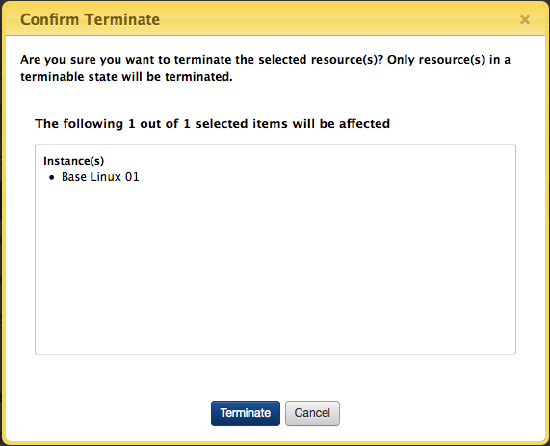
A dialog prompts you for confirmation. Click Terminate.
Stop a Running Instance
Objective
To stop a running instance from the Instances & Servers page.
Prerequisites
- Unlocked running Instances
- 'actor' user role privileges
Steps
- In the Dashboard user interface, go to Manage > Instances & Servers.
- Select one or more running instances that you want to stop.
- Click Actions and select Stop from the drop-down menu.
- Click Stop when prompted for confirmation.
Start a Stopped Instance
Objective
To start a stopped instance from the Instances & Servers page.
Prerequisites
- Stopped Instances
- 'actor' user role privileges
Steps
- In the Dashboard user interface, go to Manage > Instances & Servers.
- Select one or more stopped instances that you want to start.
- Click Actions and select Start from the drop-down menu.
- Click Start when prompted for confirmation.
Set Current Server Inputs
Objective
To define input values for a currently running/operational server. Note: Array instances and unmanaged Instances are ignored by the Set Current Inputs action.
Prerequisites
- 'actor' user role privileges
- One or more running or operational servers within a deployment
Steps
- In the Dashboard user interface, go to Manage > Instances & Servers.
- Select a currently running server instance.
- Click Actions and select Set Current Server Inputs from the drop-down menu.
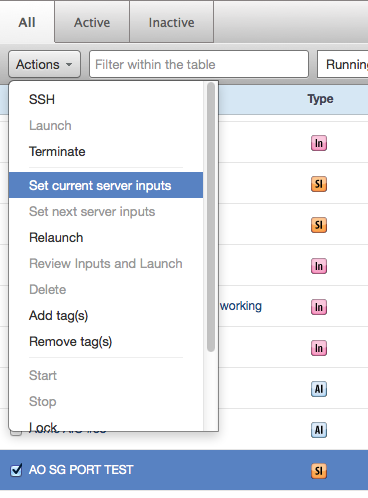
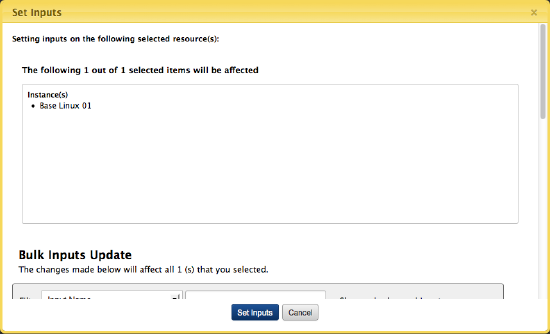
- A dialog similar to the following identifies the instances that you can set server inputs for. Scroll through the Bulk Inputs Update section and change the inputs as needed, then click Set Inputs.
Set Next Server Inputs
Objective
To set input values on the next
launch of one or more servers. Note: The Set Next Server Inputs action is not valid when servers or instances in different deployments are selected. Arrays, array instances, and unmanaged instances are ignored by the Set Next Server Inputs action.
Prerequisites
- 'actor' user role privileges
- One or more servers within a deployment
Steps
- In the Dashboard user interface, go to Manage > Instances & Servers.
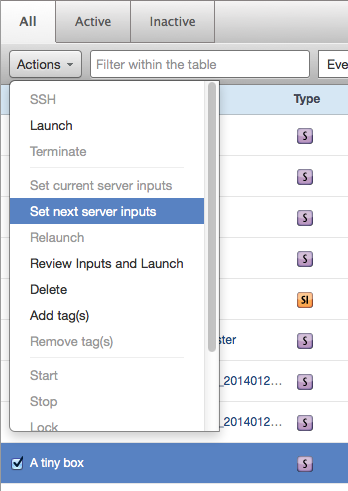
- Select one or more servers.
Click Actions and select Set Next Server Inputs from the drop-down menu.
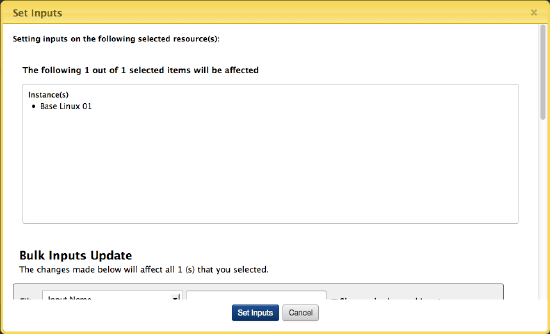
A dialog identifies the selected resources for which you can set 'next' server inputs on. Scroll down in the Bulk Inputs Update section of the dialog, set or modify server inputs as needed, then click Set Inputs.
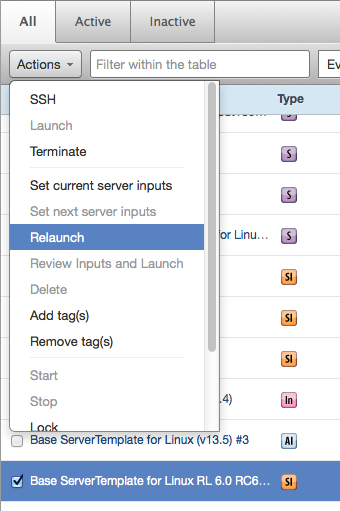
Relaunch a Server
Objective
To relaunch one or more running servers. Note: Server arrays, array instances, and unmanaged instances are ignored by the Relaunch action.
Overview
When a server is relaunched, the current instance is terminated and a new instance is launched in its place. The new server will receive a new aws-id, private DNS name, and public DNS name, because it is a completely different physical machine. Relaunching a server is equivalent to terminating the existing running server and launching a fresh new server in its place, whereas a reboot will restart the same physical machine. When you relaunch a server, the configurations and inputs that are defined under the Next
server will be used.
Prerequisites
- An active (running) Server
- 'actor' user role privileges
Steps
- In the Dashboard user interface, go to Manage > Instances & Servers.
- Click Actions and select Relaunch from the drop-down menu.
Review Inputs and Launch
Objective
Review server inputs and launch a single server.
Overview
The Review Inputs and Launch action allows you to first review (and possibly change) server inputs prior to launching the selected server. This action only works on one selected server at a time. This action is not available from the Actions drop-down if more than one server is selected.
Prerequisites
- 'actor' user role privileges
- At least one available server
Steps
- In the Dashboard user interface, go to Manage > Instances & Servers.
- Select the server for which you want to review inputs and launch.
Click Actions and select Review Inputs and Launch from the drop-down menu.
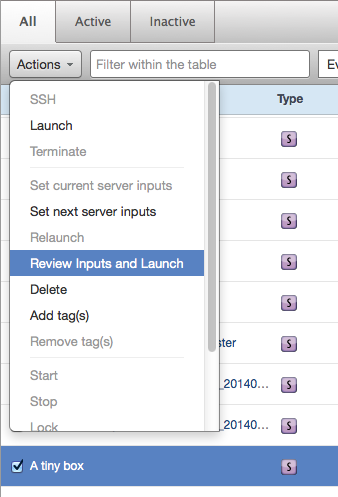
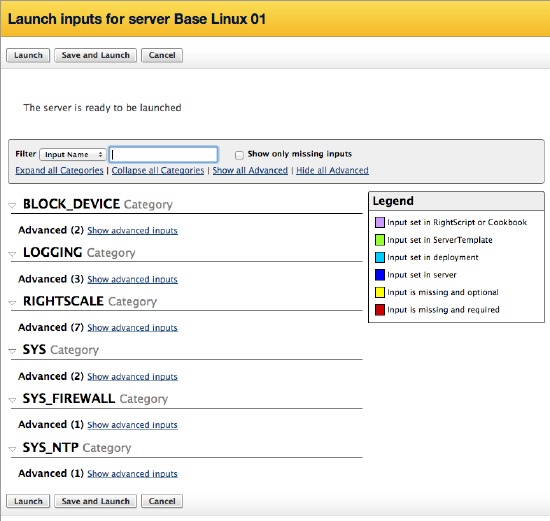
A dialog identifies the current server input values and provides an opportunity to modify these values prior to launching the selected server. Once you have reviewed and modified inputs, click Launch.
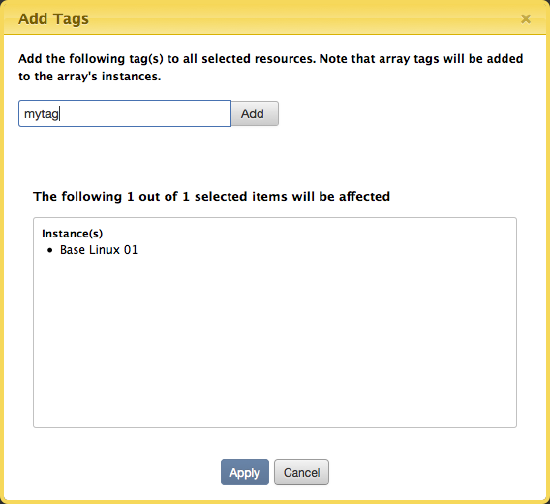
Add Tag(s) to a Server
Objective
To add Rightscale tags to one or more server objects. Note: The Add Tag(s) action is not currently available for unmanaged instances.
Prerequisites
- 'actor' User Role Privileges
- An existing server within a deployment to add or remove tags on
Steps
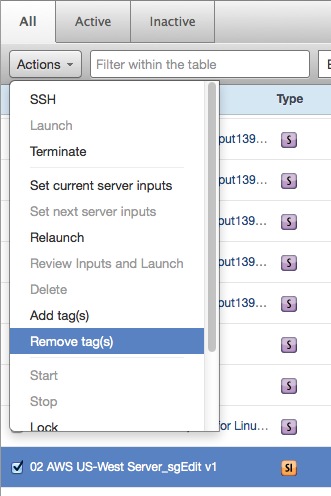
- In the Dashboard user interface, go to Manage > **Instances & Servers.
- Select on or more servers.
Click Actions and select Add Tag(s) from the drop-down menu.
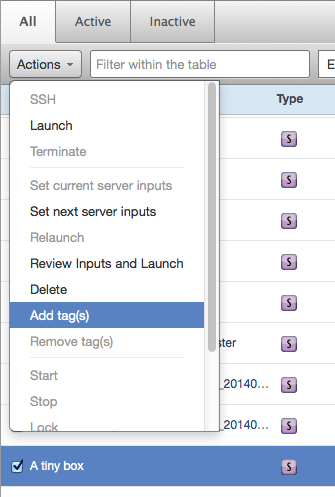
The Add Tags dialog displays. Enter a new tag in the available edit field and click the Add button. Note that you can add more than one tag without closing the dialog. Once you have completed adding your new tags, click Apply.
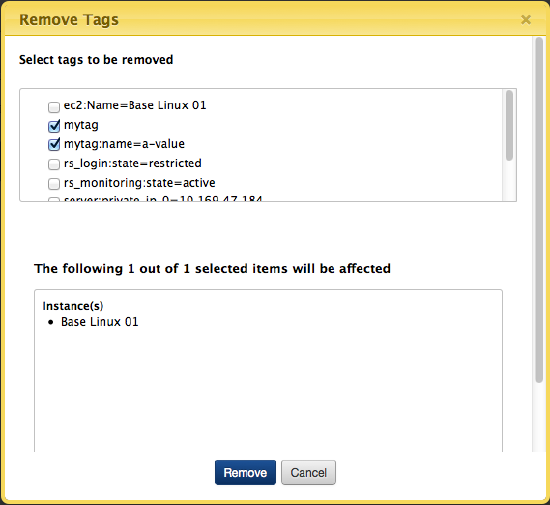
Remove Tag(s) from a Server
Objective
To remove RightScale tag(s) from one or more servers. Note: The Remove Tag(s) action is not currently available for unmanaged instances.
Prerequisites
- 'actor' User Role Privileges
- An existing server within a deployment to add or remove tags on
Steps
- In the Dashboard user interface, go to Manage > Instances & Servers.
- Select one or more servers from which you want to remove tags.
Click Actions and select Remove Tag(s) from the drop-down menu.
The Remove Tags dialog displays. Select one or more tags that you want to remove then click Remove.
Lock a Server
Objective
To lock one or more existing servers within a deployment.
Prerequisites
- One or more existing servers
- 'actor' user role privileges
Steps
- In the Dashboard user interface, go to Manage > Instances & Servers.
- Select on or more servers that you want to lock.
Click Actions and select Lock from the drop-down menu.
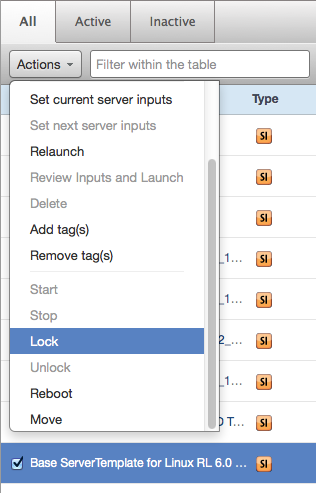
Once the selected resource is locked you will see a 'lock' icon next to the entry.
Unlock a Server
Objective
To unlock one or more existing servers.
Prerequisites
- At least one or more existing servers
- 'actor' user role privileges
Steps
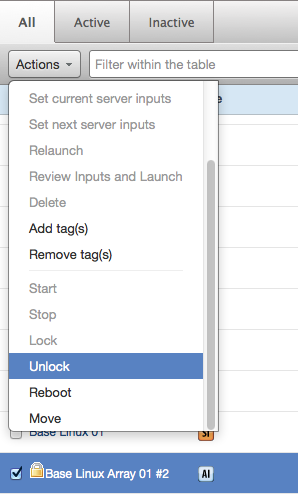
- In the Dashboard user interface, go to Manage > Instances & Servers.
- Select one or more servers that you want to unlock.
Click Actions and select Unlock from the drop-down menu.
Reboot a Server
Objective
To reboot one or more server instances.
Prerequistes
- A current (running) server
- 'actor' user role privileges
Steps
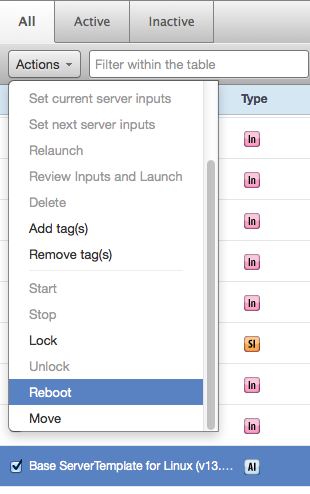
- In the Dashboard user interface, go to Manage > Instances & Servers.
- Select one or more servers that you want to reboot.
Click Actions and select Reboot from the drop-down menu.
Move a Server into a Deployment
Objective
To move one or more selected servers, or selected arrays (and all associated instances) to a different deployment.
Prerequisites
- Two deployments
- An active/inactive server or array that has been configured in a deployment
- 'actor' user role privileges
Overview
Before you move a server, it's important to fully understand its ramifications. Remember, a deployment is a RightScale-specific concept. Deployments provide a means of logically grouping a set of servers together. Typically, you will create a separate deployment for each project in your RightScale account. Servers within a deployment will inherit any input parameters that have been defined at the deployment level unless they are overwritten at the server or server array levels. As a best practice, we strongly recommend that all inputs be defined at either the ServerTemplate or deployments levels. (See Understanding Inputs.) Therefore, due to the laws of input inheritance, when you move a server from one deployment to the next, it may inherit different input parameters.
You can move both active and inactive servers. Remember, you're not physically moving a server from one cloud to the next. When you move a server you are only changing the deployment with which it's associated. In addition, it is possible to move a raw server instance to 'no deployment' which causes the server to be removed from the deployment it is currently associated with.
Moving an Active (Operational) Server
When you move an active, running server, none of its current configurations will be changed. However, it is important that you understand which of its inputs are being inherited from the deployment level, because any script that is run after the server has been moved will get its input parameter(s) from the the new deployment. Also, if the server is relaunched, it may be configured completely different the next time it's launched depending on what input parameters are inherited from the deployment level.
Steps
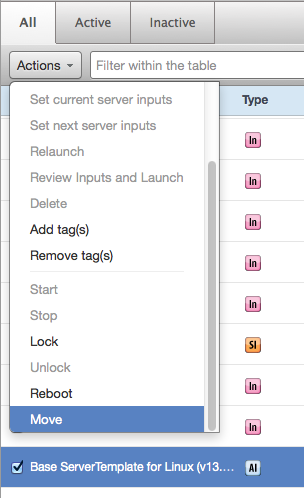
- In the Dashboard user interface, go to Manage > Instances & Servers.
- Select the server(s) you want to move to a different deployment.
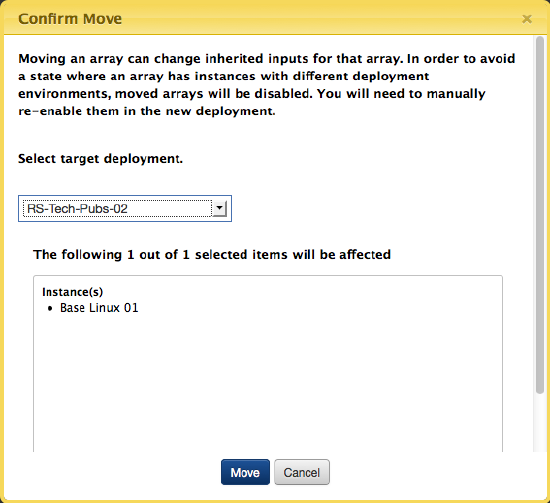
Click Actions and select Move from the drop-down menu.
The Confirm Move dialog displays. Use the available drop-down control to select the deployment to which you want to move your selected servers/arrays. Once you have selected the target deployment, click Move.
Transfer Files Using SFTP
Objective
Transfer files between your local machine and a server running in the cloud.
Overview
If you have configured your SSH user preferences and settings to utilize the ssh:// protocol connection method, you can transfer files using the SFTP protocol. The SFTP file transfer capability is not available if you have configured your SSH settings to either the Java Web Start™ or Java Applet connection methods.
Prerequisites
- A running cloud instance
- Valid key authentication for establishing a secure shell connection. The type of required key authentication varies depending on the underlying machine image and your SSH user preferences and settings.
- 'server_login' and 'server_superuser' if you are running RightImage 5.7 and lower (both roles will need to be enabled to be able to SSH into a server). If you are running 5.8 or newer, like with 5.7 and lower, you can have both roles enabled or you can have either 'server_login' (which allows you to login as the user of the account without root access) and 'server_superuser' (which allows you to login as root to the server). For more information, see RightScale Account and User Management.
- If you're using a cloud that support security groups to control the instance's firewall permissions (e.g. AWS) you must configure the security group to allow SSH access over TCP port 22. See Create a New Security Group.
- If you are using a VLAN cloud that uses IP port forwarding instead of security groups to control an instance's firewall permissions you must set up a port forwarding rule for TCP port 22 to allow SSH access. See Create new Port Forwarding Rules.
- Requires 'server_login' user role privileges to SSH into a server from the RightScale dashboard.
- Requires the ssh:// protocol SSH user setting.
- An SFTP client on your local machine properly configured to utilize SSH private key authentication.
Steps
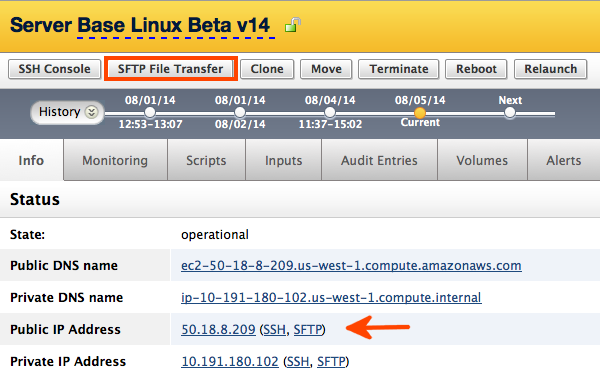
At the server level, use the following steps to transfer files using SFTP.
- Navigate to the running server show page.
Click either the SFTP File Transfer button or the SFTP link as shown below.
Depending on your operating system and browser version, you may be prompted to select the SFTP client that you want to use to transfer files.
Use your SFTP client of choice to transfer files to/from the running server. See the operating instructions for your SFTP client for detailed information on file transfer procedures.
As indicated above, the SFTP file transfer capability is only available if your SSH settings are configured to use the ssh:// protocol.
Selecting Server Pricing Type
Overview
Although there are 3 different EC2 instance purchasing options, you can only manually control whether you launch an On-Demand or Spot Instance.
- On-Demand Instances
- Reserved Instances
- Spot Instances
Although Reserved Instances are manually purchased from Amazon, it is Amazon, not you, who determines whether your On-Demand instances should be billed at the discounted Reserve Instance price or at the standard On-Demand Instance price. As a user, you can only control whether or not you are launching an On-Demand or Spot Instance.
Steps
How do you select a Server's Pricing Type? By default, all Servers will be configured to launch On-Demand Instance types unless you overwrite this preference at the Server level. Once a Server has been added to a Deployment:
- Select
Spot
as the instance type under a Server's Info tab - Click Edit. If you want to launch a
Spot
instance type, you will also need to define the Maximum Bid Price. Use thehistory
link to view recent changes to the current spot price. Note: Amazon typically changes the spots randomly throughout the day. - Click the Save action button when ready
Spot Instances do not support start/stop functionality.
It is also possible to specify Server Priciung Type from within the Add Server wizard on the Server Details page. Use the Pricing dropdown control to select either On Demand
or Spot
.