Objective
To upload new machine images (e.g. RightImages) to a vSphere cloud that are specifically designed to launch instances (i.e. virtual machines) via the RightScale Dashboard/API where RightScale's core features such as real-time graphical monitoring, machine tagging, remote script execution, etc. are supported.
Prerequisites
- Access to log in to the vSphere client console
- vSphere setup with a properly installed RightScale Cloud Appliance for vSphere (RCA-V). See Download, Deploy, and Configure the RightScale Cloud Appliance for vSphere (RCA-V).
Steps
- Download the image(s) that you want to upload to your vSphere cloud environment. These are equivalent to VM templates.
- Linux images (Link to CentOS and Ubuntu Repository - Use the latest image)
- Windows 2008R2 and 2012 - Please contact your account rep
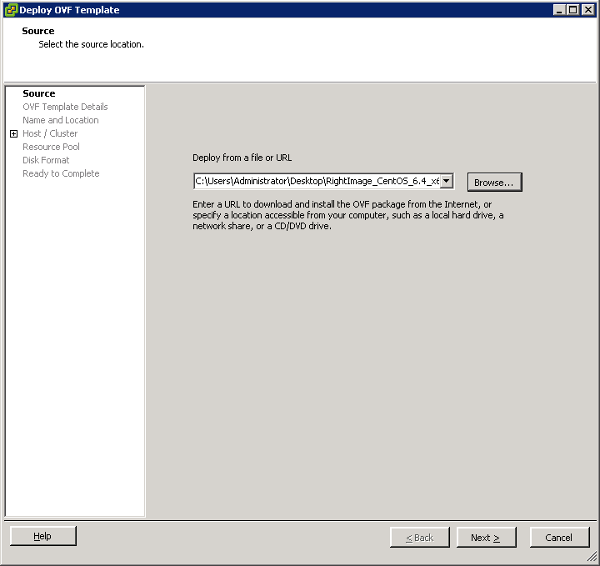
- Open the vSphere Client and choose File > Deploy OVF Template.
Specify the source location of the OVA file. You can either browse to a locally saved file or enter a URL.
Verify the Template's details and click Next.
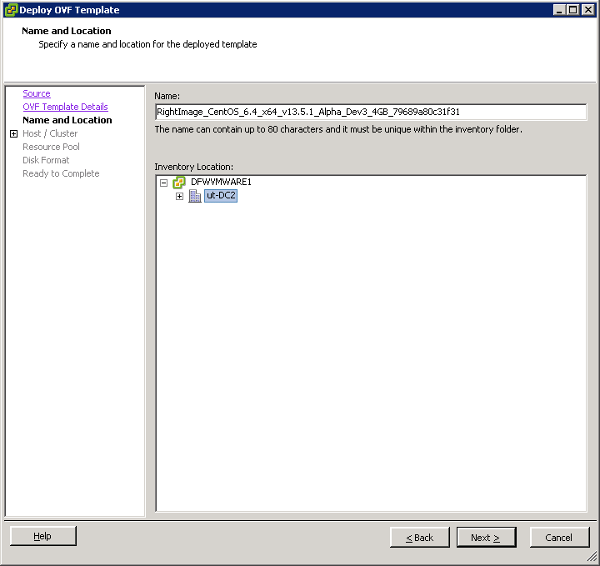
Name and Location: Provide a name for the image (e.g. RightImage_CentOS_7.0_x64_v14.2_VMware.) and click Next.
Recommendation: Since RightScale uses the image name to recognize it as RightImage, it is strongly recommended that the default name be used and not change the name of the image.
Host/Cluster: Choose a datacenter/cluster and click Next.
- Specific Host: Choose a specific host within the cluster and click Next.
Resource Pool: (Optional) Select a resource pool (if one exists) and click Next.
Storage: Select a destination storage for the virtual machine (VM) files.
Disk Format: Specify the format for storing the virtual disks.
- Choose Thin Provision and click Next.
Network Mapping: Specify which networks should be mapped to the instance. You should see both a private and public network. No changes are required. Click Next.
Once the OVF is deployed, it will appear as a powered-off VM in your vSphere client. Right-click on it, pick Template->Convert to Template.
Next Steps
Please proceed to the next step in the setup guide.