Overview
The Amazon Virtual Private Cloud (Amazon VPC) feature lets you define a virtual network in the cloud that you can launch AWS resources into. An Amazon VPC is dedicated to your AWS account and is logically isolated from other virtual networks in the AWS cloud. You can configure your VPC to suit your particular needs by defining its IP address range, subnets, route tables, network (Internet) gateways, and other security settings.
An Amazon VPC offers the benefit of a scalable infrastructure while providing capabilities similar to a traditional network that you would operate in your own premises. Before proceeding with VPC setup in RightScale, we recommend you review the following documentation on the Amazon AWS website.
This document describes how to set up a Virtual Private Cloud (VPC) in Amazon Web Services (AWS) using the RightScale Network Manager. It is important to note that the network scenario described below has been simplified for demonstration purposes and that your particular VPC requirements may differ. For instance, only a single public subnet is included in this example, whereas multiple subnets (both public and private) may be required for your needs. In addition, AWS network Access Control Lists (ACLs) are not discussed or included in this example. We encourage you to examine the various scenarios documented by AWS in determining the proper configuration for your VPC.
The following sections outline the procedure for creating and configuring a simple Amazon VPC using RightScale.
Prerequisites
- 'security_manager' user role privilege
Steps
Create a (VPC) Network
The first step in setting up an Amazon VPC using RightScale is to create a network using the Network Manager. Creating a VPC includes specifying the set of IP addresses for the VPC in the form of a Classless Inter-Domain Routing (CIDR) block (for example, 10.0.0.0/16).
- In the RightScale Dashboard, navigate to Manage > Networks.
- Click New Network. The New Network dialog displays.

- Select a cloud and enter a name for the new VPC along with a short description. For this example, we will use 'my-vpc-example' as the network name. Click Next.
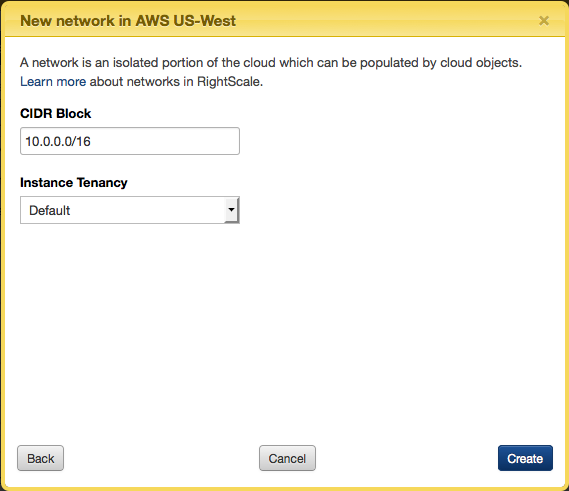
- Enter a value for the CIDR Block (10.0.0.0/16 in this example) and use the Default setting for Instance Tenancy. Click Create. You should see a 'growler' message near the top of the Dashboard indicating that the network was created successfully.
Create and Attach an Internet VPC Gateway
Next, we create an internet gateway and attach it to the network you created in the previous step. The role of the internet gateway is to enable your servers to connect to the Internet from within the VPC.
- Under Select Resource click Network Gateways , then click New Network Gateway. The following dialog displays.
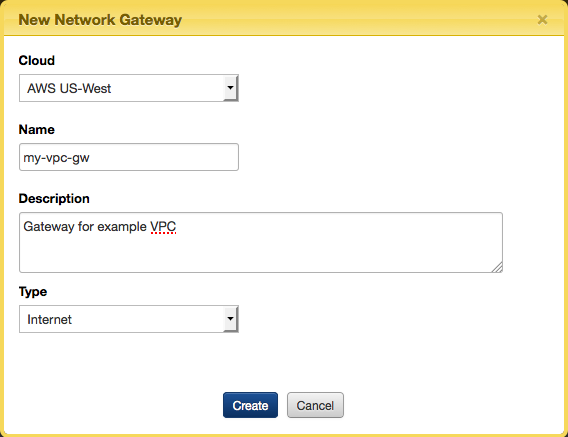
- Select the same Cloud you used for creating the network, enter a Name and Description and select Internet for Type. Click Create. You should see a 'growler' message near the top of the Dashboard indicating that the network gateway was created successfully.
- In the Network Gateways list, click the entry for the gateway you just created, then click Edit. The following dialog displays.
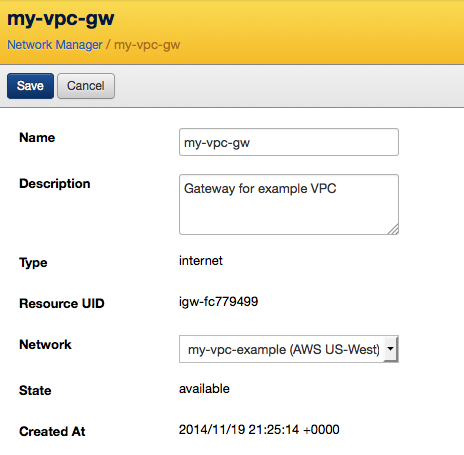
- Open the Network drop-down and select the network you created earlier (my-vpc-example). This associates the gateway with your network. Click Save.
- Navigate back to the Network Manager view. Under Select Resource click Networks.
Create a Public Subnet
A subnet is a range of IP addresses within your VPC. When you configure a server in your VPC using RightScale, you specify a subnet into which that server will launch. You should create a public subnet for resources that must have access to the Internet, and a private subnet for resources that will not be connected to the Internet.
- Click the entry for your new network then click the Subnets tab. Click New Subnet. The following dialog displays.
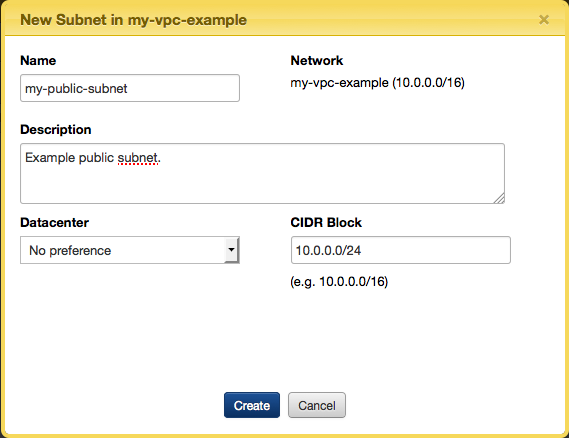
- For this example we will create a public subnet. Enter a Name and Description for the new public subnet. Enter a value for the CIDR Block. In this example we will use 10.0.0.0/24. Click Create.
Create Security Group for NAT Server
A security group can be thought of as a firewall for the RightScale servers running in your VPC. Security groups control inbound as well as outbound traffic at the instance level. Here we create a security group for the Network Address Translation (NAT) server that we will launch in a subsequent step.
- Click the Security Groups tab then click New Security Group. The following dialog displays.
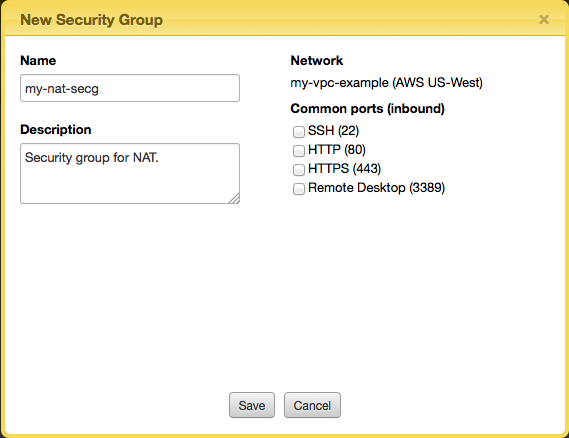
- In this example, we will use 'my-nat-secg' for Name. Click Save to create the new security group.
- Next, create a new Rule for the 'NAT' security group (my-nat-secg). Click the entry for 'my-nat-secg' then click New Rule. The following dialog displays.
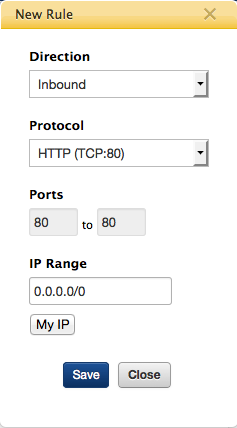
- Enter field values as shown above. This creates a rule allowing inbound HTTP access from anywhere to the NAT server. Click Save.
- Now create a second inbound rule to allow traffic from TCP port 443 within the 0.0.0.0/0 IP range. This allows inbound HTTPS traffic from anywhere to the NAT server. Click Save.
- Create a third inbound rule to allow traffic from TCP port 22 for the 0.0.0.0/0 IP range. This will allow inbound SSH access to the NAT instance from the Internet gateway.
- Next, create an outbound rule allowing egress traffic on TCP port 80 for IP range 0.0.0.0/0. This will allow outbound HTTP access to the Internet.
- Create one final outbound rule allowing egress traffic on TCP port 443 for IP range 0.0.0.0/0. This will allow outbound HTTPS access to the Internet.
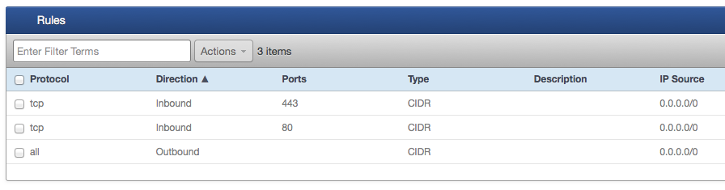
- You should end up with a set of rules as follows.
In addition to the above-mentioned security group rules, you may wish to temporarily add inbound/outbound rules for the Internet Control Message Protocol (IMCP) which will allow you to use tools like PING for testing and diagnostic purposes. For example, if you add an outbound ICMP rule with a CIDR of '0.0.0.0/0' to the NAT security group, you can then log in to the NAT server using SSH from RightScale and then use PING to determine accessibility to the internet from the NAT. Additionally, you could add an inbound rule for TCP port 22 (SSH) with an IP range that includes your corporate network as a source. This would allow inbound SSH access directly from your network. Finally, to handle inbound traffic from other instances assigned to this security group you will need to create a rule for all inbound traffic for all protocols originating from the 'my-nat-secg' security group ID.
Create a Custom Route Table
Next, we modify the default route table to route traffic through the internet gateway.
- Navigate to the Route Tables tab. Click the default route table, navigate to the Info tab and click Edit.
- Rename the route table as 'my-custom-route-table'. Click Save.
- Click New Route. For Destination CIDR enter '0.0.0.0/0'. For Next Hop select 'Network Gateway'. In the Network Gateway drop-down select the internet gateway you created above. Click Create.
Create an Elastic IP Address for the NAT
Next, we create an Elastic IP address, which enables the NAT instance to be reached from the Internet.
- In the RightScale dashboard, navigate to Clouds > [AWS Region you selected for your VPC] > IP Addresses. Click New. The following screen displays.
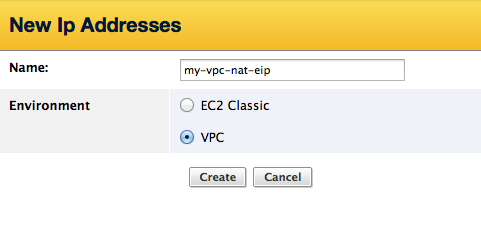
- Enter 'my-vpc-nat-eip' for Name , choose the VPC option and click Create.
Create and Launch a NAT Host Instance
We now need to create and launch a NAT host within the public subnet so we can test our VPC and communicate with the external world.
- Navigate to the MulitCloud Marketplace and import the following AWS NAT ServerTemplate into your deployment. http://www.rightscale.com/library/server_templates/AWS-VPC-NAT-ServerTemplate-v14/lineage/50465
- Click Add Server. Select your Cloud (AWS region) and desired Deployment and click Create.
- In the Server Details screen, choose your public subnet in the Subnets drop-down.
- Select your NAT security group in the Security Groups drop-down.
- Select the NAT elastic IP address in the Elastic IP Address drop-down.
- Select the IP Forwarding Enabled option.
- Click Finish , then click Launch.
- Review your server inputs in the pre-launch screen as address missing inputs as needed, then click Launch. (Note: You may need to specify a key value for the AWS access key inputs)
- Wait until the NAT host goes operational before proceeding with the next step.
Build Out the Rest of Your VPC
Now that you have the basic VPC set up and configured, you can add additional resources to the public subnet such as a web application server. Or, you can expand your VPC to include a private subnet for securing additional back-end resources such as non-publicly accessible database servers. We encourage you to explore the variety of VPC scenarios documented on the AWS site.